Saturday, August 06, 2005

True Artistry


These amazing two knife sheaths were created by J Drewes, a knife maker from Minnesota and I had the priviledge to have both in my hand. The photos do no justice to this amazingly artistic work - it is not often that it is so pleasantly visible that a lot of thought and care had gone into the creation of a leather article.

The fins and Frog feet are thinned and sculpted to look very real and yet the leather looks very strong and durable indeed - here is indeed a leather artist who enjoys what he is doing....

Thursday, July 14, 2005

Life casting

Leather Ralated? Yes, this is the first part that comes before the mask making you can also see on this blog - just about a month or two ago.

I attended the first of three classes by Alex Ortega in the making of your own mold on which to make a leather Commedia Del'Arte mask. The mold is of your own face! Freaky! But extremely interesting and a huge lot of fun!


The first part is to make a cardboard surround for your face so that the dentist's plastic do not drip on everything.


The subject lies ready to face the ordeal...!


The cold stuff hits your face and all goes dark - even through your closed eyelids. Two straws up the nose are your only breathing holes to the outside world and you have to lie with a totally still face for a few minutes while the plastics sets. You can hear all around you, but you cannot respond.

Alex was very good with a pre-arranged signal that would have the goo off your face in seconds if you felt uncomfortable!


While you lie there, motionless, a layer of plaster is applied over the dentist's plastic to support it - although it picks up the minutest detail of your skin, the plastic is not very tear resistant and is almost like very stif jello. From the time the first plastic hits your face to the time you can sit upright again, is probably only about 20 minutes. (The pink stuff smells very pleasantly of cinnamon and is not tooooo uncomfortable on your face.)


The first of the casts comes off and it is a negative copy of your face. This will be used to make a plaster copy of your face. Even the pores on your nose are shown on this material and on the plaster cast made of this.


This is the second casting - plaster into the flimsy pink negative - this will be the first copy of your face.


And this is what the copy of your face looks like!

Soon, more photos of myself suffering this indignancy and what my own mold looks like!

Friday, July 01, 2005

Lazy Dots


My son has to have belt for the Renaisance Fair - so I had to make one, not too fancy, so I decided on small gold dots.

This as achieved by simply doing the dots with a big round seeder, and then gilding them with Plaid Gold Leaf - quick and dirty....!

Here is some detail:


Thursday, June 23, 2005

Braiding at the Lake

With the brief summers we get in Minnesota, it is almost a sin to sit inside, tied to the braiding hook on your workbench, so I decided to come up with a mobile braiding station - this also allows me to work anywhere in the house and at demo's.


First, of course, my disclaimer: I am not a perfectionist and I am not a woodworker. My only aim in building this contraption was functionality, I was not about to invest a lot of effort in a prototype that might not even work.


The upright is hinged on the floorboard so that the whole thing can collapse when the two diagonals are disengaged at the top.


The two diagonals are fixed to the floorboards with 'studs' that screw into the wood and then have a protruding bolt. The diagonals can move freely on these bolts so that they can fold down and lie flat on the floorboard - to enable this, their bottom ends are rounded so as not to get stuck against the floorboard.


At the top the diagonals are fixed to the upright with the same studs, but this time with wingnuts so that they can easily be detached. At both the bottom and top, they are purposefully not in line so that the studs do not screw into each other in the middle of the upright.


I might still make some modifications to the top of the upright - the 'working end'. The two hooks work fine to hook the braiding on, but to take up the already braided excess, I need a better plan... so look out for an update in a month or two...!


Happy braiding!

Friday, June 17, 2005

Renaissance Fair Hat


With Ouma and the old Singer to help, the hat making project got under way! (They did all the work between them!)


The hat is constructed of a thin cow suede with a cotton lining and some interface - the pattern was a Simplicity one, I think....


The Singer, equipped with a modern leather needle, had no difficulty with three layers of suede plus two of lining, but I had a tough time fitting the hat under the foot of the machine to do the sewing.


So here is the beginning of a very young German Leather Merchant, for the Minnesota Ren Fest - Oh yes, a plume still needs to be acquired...!

Friday, June 10, 2005

Knife Sheath - A Simple One

Now, I have to ask you not to look at the knife itself - it is a third rate actor I got very cheap just to stand in for the real thing - I wanted a cheap one to use for a range of sheaths I want to make and I did not want to worry about an expensive knife as part of the exercise. This one cost me less than a dollar.

This sheath is one of the simplest you can make, with the least amount of tools.


The leather is cut with enough excess to make sure there will be plenty to go round the knife.


The knife is wrapped in cling wrap to make sure it does not rust or put a black metal stain on the leather.


The leather is not stretched over the knife so that there is no tension on the sheath - there is therefor no reason to clamp down the sides of the sheath when it is drying out. After rubbing it into shape with my fingers, I simply let it sit overnight to dry.


When dry, the excess leather is trimmed off, the stitch line is marked and the sheath is stitched. A very dense sponge behind the leather helps to poke the holes with an awl - it supports the leather so that your fingers do not have to be behind the leather and dodge the very sharp awl.


The diamond shaped holes of the stitching awl causes the stitches to lie next to each other and appear very neat.


I was not satisfied with the staining on the edge so I redid it after I had finished the stitching.


Two very simple straps are installed on the back behind the knife handle - this will hold the handle against the leather or the leather against the knife. In this very simple sheath there is no provision for carying the sheath on your belt.


All that remains is a treatment with Dubbin and this sheath is done!

Saturday, June 04, 2005

For an Old Car

Every now and then something different comes along - this time I was asked to make straps that would hold down the canopy of an old 1910 car - tension straps to make sure that canopy would be tight.

The request was easy enough, but the catch was that the snaps and buckles had to be sewn onto the straps (straps folded over and hand-sewn).


To meassure them, cut them, round the edges, thin them on the foldovers, stitch them by hand and dye the edges, took nine hours of straight non-stop work.

To make the other few pieces shown below, took another two hours....

Not too bad, except that I had less than 17 hours from the time I received the hardware until the time they had to be delivered - and I wanted to fit a night's sleep and some eating in there as well....


Wednesday, May 25, 2005

Mask Making Class #2

Last night we concluded the class, but the home work continues....

But let me start where I left off....


Here you can see just how much the leather has to stretch to fit around the mold.

With a lot of tapping and burnishing, allth detail comes to the fore - the mold is rough and full of character and the leather thin enough to shown almost all of it.


After the first mask had dried completely, I took it off and made a second one with a thicker leather. (To get technical: the mask on the left was made with 2-3oz leather and the one on the right with 5-6oz leather.)


With the leather in shape, we trimmed away the excess around the edges and the gathering under the nose, so that a small seam can be made.


It is the wet leather (under the noses) that make it appear so dark.

Next time, coloring the mask ......

Thursday, May 19, 2005

Mask Making Class #1

After continuously teaching others about leather and how to do various aspects of leathercraft, it is refreshing to be on the other side for a change. I started a class in Commedia del'Arte Mask Making given by Alex Ortega. And the one important ingredient to leatherwork classes was there: fun!

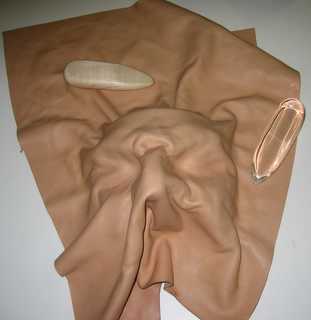
This is the start: wet leather is formed over a mold. (This is a life cast of a person's face, that have been embellished to give more character.)


By continuously rubbing and tapping with the small point of the hammer, the leather stretches over the mold.


It takes a lot of work to convince the leather to take the shape you want it to take! But once you start the process, you do not want it to end!


This is where we ended with the class - another three hours of work and the results in the next posting!